How to use tools to process videos in SimBA
We have developed video and image processing tools and incorporated them into the overall SimBA pipeline. However, many of the tools are useful on their own or in “one-off” situations. To make these easily accessible, the tools have been incorporated into their own space within the GUI, and are described below.
Shorten Videos
This is a tool used to trim video lengths. The tool contains two different methods:
Method 1 and Method 2.
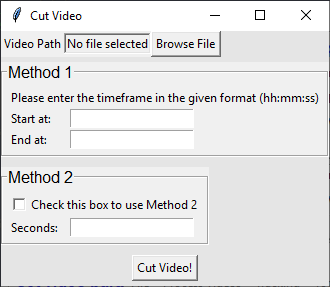
Method 1
Use Method 1 to trim both the beginning and the end of the video.
Let’s say we have a 2 minute long video and we want to get rid of the first 10 seconds, and the last 5 seconds.
We would start our video on at 00:00:10, and end the video at 00:01:55.
First, click on
Browse Fileto select the video to trim.Enter the start time in the
Start at:entry box, in this case it will be 00:00:10Enter the end time in
End at:entry box, in this case it will be 00:01:55. The settings should look like the image below.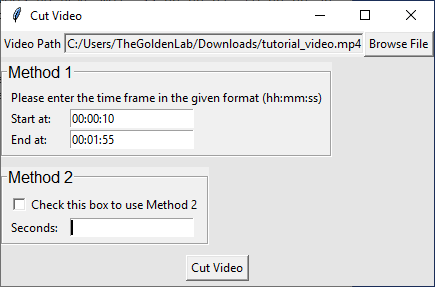
Click
Cut Videoto trim the video and a new shorter video will be generated. The new shorter video will have a name of Name of original video + _shorten and will be located in the same folder as the original video.
Method 2
Method 2 cuts of the beginning of the video.
Let’s say we have a 2 minute long video and we want to get rid of the first 20 seconds from the start of the video.
Enter the amount of time that needs to be trimmed from the start of the video in
Seconds:, in this case it will be 20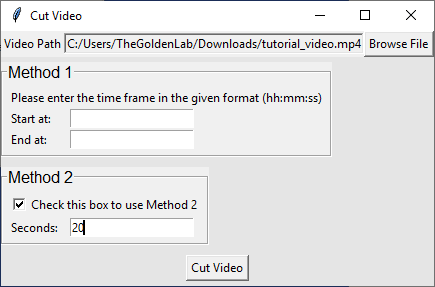
Click
Cut Videoto trim video and a new shorten video will be generated, the new video will have a name of Name of original video + _shorten and will be located in the same folder as the original video.
Clip video into multiple videos
This tool can help users to cut the videos into multiple clips/section.
Click on the
Clip video into multiple videosfrom theToolssection.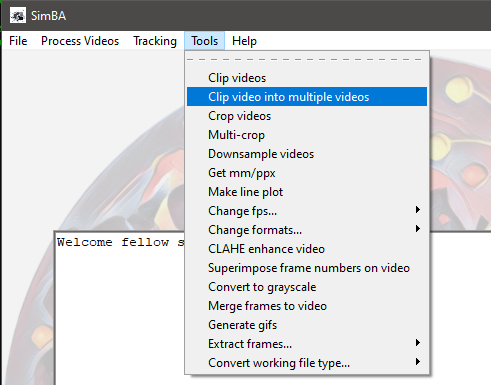
Select the video that you want to split/clip by clicking
Browse File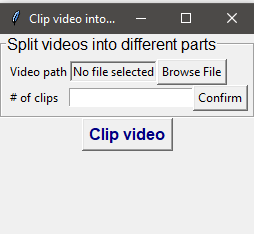
Put in the number of output clips/sections that you want in
# of clips, and clickConfirm. Please note that if you put in the wrong number the first time, you can re-enter the number and clickConfirmto change the table.
Then enter the
Start TimeandStop Timein the following formatHH:MM:SS. For example, for a minute and 20 seconds it will be00:01:20.Once the table has been filled, click
Clip videoand the video will be output on the same folder path/ directory of your original video.
Crop Video
This is a tool to crop videos.
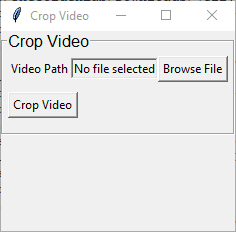
First, click on
Browse Fileto select a video to crop.Click on
Crop Videoand the following windowSelect ROIwill pop up.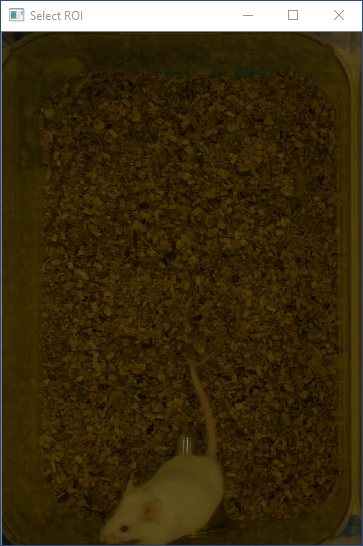
Use your mouse to Left Click on the video and drag the rectangle bounding box to contain the area of the video you wish to keep. You can always left click and drag on the video to recrop your video
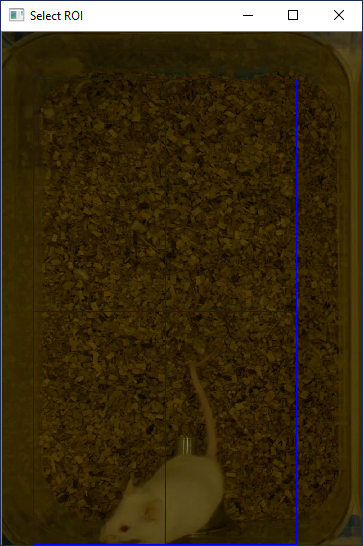
Hit
Entertwice and SimBA will crop the video. The new video will have a name of Name of original video + _cropped and will be located in the same folder as the original video.
Fixed Crop Videos
This tool allows the user to crop once and apply the same dimension to the rest of the videos in the folder.
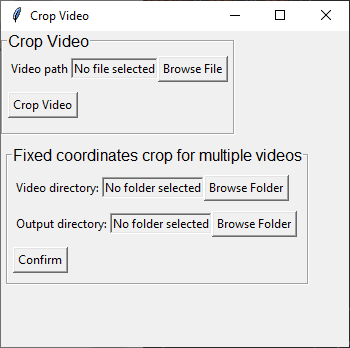
Under
Video directory, select the input video folder by clickingBrowse Folder.Then, select an output folder.
Click on
Confirmand an image will pop up, use your mouse to Left Click on the video and drag the rectangle bounding box to contain the area of the video you wish to keep. You can always left click and drag on the video to recrop your videoHit
Entertwice and SimBA will crop all the videos in the folder with the same coordinate. The new videos will have a name of Name of original video + _cropped and will be located in the output folder.
Multi-crop videos
This is a tool to used to multi-crop videos. For example, if you recorded four different environments with a single camera, you can use this tool to split single recordings into 4 different videos. This tool operates on all videos in a folder that is defined by the user. The user is required to draw the number of defined rectangles on each of the videos in the specified folder.
First, click on Multi-crop and the following menu will pop-open:
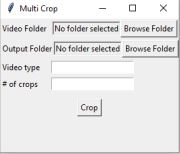
Next to Video Folder, click on
Browse Folderand select a folder containing the videos you which to multi-crop.Next to Output folder, click on
Browse Folderand select a folder that should house the cropped output videos.Next to Video type, type the file format of your input videos (e.g., mp4, avi etc).
Next to # of crop, type in the number of cropped videos you which to generate from each single input video (e.g., 4). Click on Crop to proceed. When you click on Crop, the first frame of the first video in the specified folder will be displayed, and the name of the video and rectangle number is printed overlaid:
Left click the mouse and drag from the top left corner to the bottom right corner of the first video you wish to generate. When finished with the first video, press
Enter. Repeat this step for the next videos you wish to generate from Video 1. Once Video1 is complete, repeat these steps for all the videos in the user-specified Video Folder.The cropped output videos will be located in the user-defined Output folder as defined in Step 3.
Downsample video
This is a tool to downsample a video into smaller size and reduce the resolution of the video.
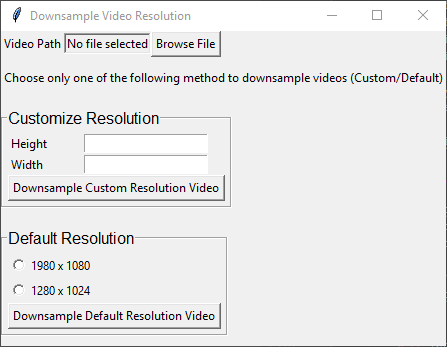
The downsample video tool has two options: Customize Resolution and Default Resolution.
Customize Resolution
Use this tool to downsample video into any height and width.
First, click on
Browse Fileto select a video to downsample.Then, enter any values in the
HeightandWidthentry boxes.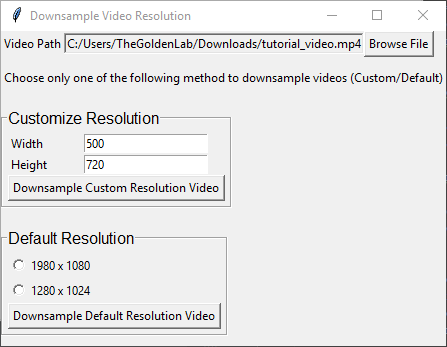
Click on
Downsample to custom resolutionto downsample the video. The new video will have a name of Name of original video + _downsampled and will be located in the same folder as the original video.
Default resolution
This tool allows the user to downsample a video quickly.
First, click on
Browse Fileto select a video to downsample.Tick on one of the resolution options.
Click on
Downsample to default resolutionand the video will downsample into the selected resolution. The video will be located in the same folder as the original video.
Get Coordinates (calibrate distance)
This tool is to get the length (millimeter) per pixel of a video.
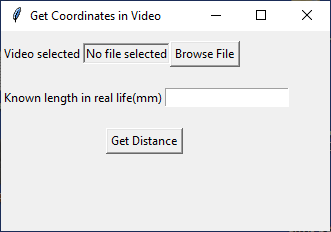
Let’s say we want to find out the metric length per pixel of a video of a mouse in a cage, and we know the width of cage is 130 millimeters (it’s a tight one).
First, click on
Browse Fileto select a video.Enter 130 in the
Known length in real life(mm)entry box.Click on
Get Distance, and the following window will pop up.
Note
When the frame is displayed, it may not be shown at the correct aspect ratio. To fix this, drag the window corner to the correct aspect ratio.
Use your mouse to double Left click at the left side of the cage and double Left click again on the right side of the cage. These are the known distance of 130 mm.
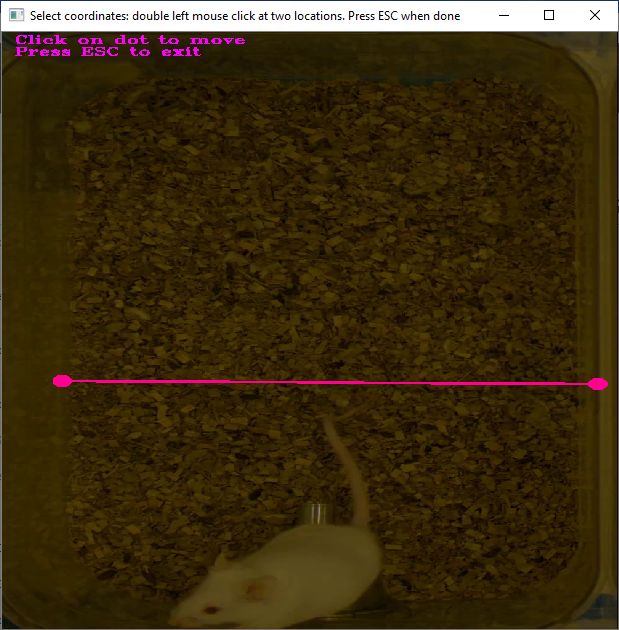
Tip
You can double click any point again to change the location of the point.
Once two points are selected, hit
Escbutton. The millimeter per pixel value is printed in the main SimBA interface.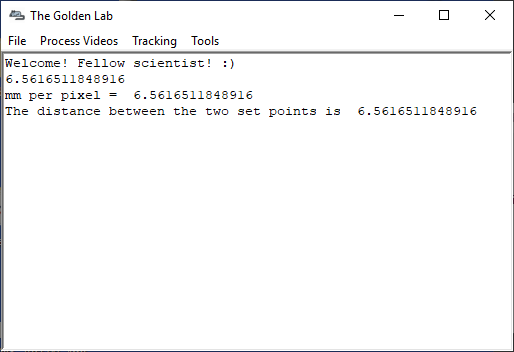
Change formats
This menu includes Change image formats and Change video formats
Change image formats
This tool allows the user to select a folder containing multiple images and convert the formats.
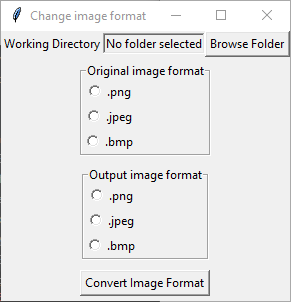
Click on
Browse Folderto select a folder that contains multiple images.Choose the original format of the images in the selected folder.
Choose the desired output image format.
Click on
Convert image file format.
Change video format
This tool allows the user to convert the file format of a single or multiple videos.
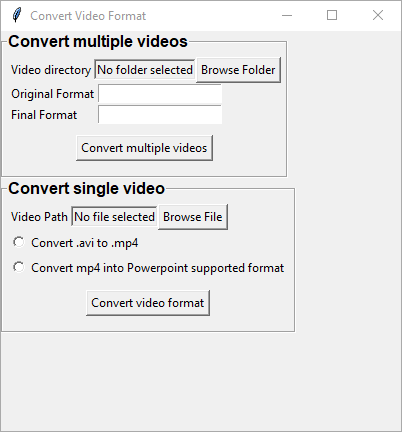
Convert multiple videos
Click on
Browse Folderto select the directory that contains the videos that you want to convert.Enter the original file format (eg: mp4, flv, avi etc.) in the
Input formatentry box. Note: do not put dots (‘.’) in the file format name (eg: mp4 or flv, etc).Enter the desired output format in the
Output formatentry box .Click on
Convert multiple videos.
Convert single video
Click on
Browse Fileto select a video to convert.Choose one of the following
Convert .avi to .mp4orConvert mp4 into Powerpoint supported formatClick on
Convert video format.
CLAHE enhance video
Click on
Browse Fileand select a video file.Click
Apply CLAHE. The new video will have a name of CLAHE_ Name of original video. The new file will be in a .avi format will be located in the same folder as the original video.
Superimpose frame numbers on video
This tool creates a video with the frame numbers printed on top of the video.
Click on
Superimpose frame numbers on videoand a new window will pop up.Select a video and click on
Open.The new version of the video will be created with the name Name of original video + _frame_no and will be located in the same folder as the original video.
Convert to grayscale
Click on
Convert to grayscaleand a new window will pop up.Select video and click
Open.The new greyscale version of the video will be created and have the name Name of original video + _grayscale. The new video will be located in the same folder as the original video.
Merge images to video
Click on
Browse Folderto select a folder containing multiple frames.Enter the input image format of the frames. Eg: if the image name is Image001.PNG, enter PNG in the
Image formatentry box.Enter the desire output video format. Eg: if the video should be in .mp4 file format, enter mp4 in the
Video formatentry box.Enter the desire frames per second in the
fpsentry box.Enter the desired bitrate for the video in the
Bitrateentry box.Click on
Merge Imagesto create the video.
Generate gifs
Click on
Browse Fileand select a video to convert to a GIF.Enter the starting time of the GIF from the video in the
Start times(s)entry box.Enter the duration of the GIF in the
Duration(s)entry box.Enter the size of the GIF in the
Widthentry box. The output GIF will be scale automatically.Click on
Generate gifto create the gif.
Extract Frames
The Extract frames menu has two options: Extract defined frames, Extract frames, and Extract frames from seq files.
Extract defined Frames
This tool allows users to extract frames from a video by inputting specific start- and end-frame numbers. This is useful if you want to extract a subset of frames from a larger video, without first needing to generate a new video of the desired length.
Click
Browse Fileto select a video.Enter the starting frame number in the
Start Frameentry box.Enter the ending frame number in the
End Frameentry box.Click on
Extract Framesto extract the frames from theStart Frameto theEnd Frame.A folder with the video name will be generated and the all the extracted frames will be located in the folder. The frames will be in .png file format.
Extract frames
Use this tool to extract every frame from a single video or multiple videos.
Single video
Click on
Browse Fileto select a video file.Click on
Extract Frames(Single video)to extract every frame from the video.A folder with the video name will be generated and the all the extracted frames will be located in the folder. The frames will be in .png file format.
Multiple videos
Click on
Browse Folderto select the folder with videos.Click on
Extract Frames(Multiple videos)to extract every frame from the video.Folders with the video name will be generated and the all the extracted frames will be located in the folders. The frames will be in .png file format.
Extract frames from seq files
Use this tool to extract all the frames from a video in seq file format.
Click on
Browse Fileto select a video.Click on
Extract All Framesto extract all the frames from the video.A folder with the video name will be generated and the all the extracted frames will be located in the folder. The frames will be in .png file format.
Convert . seq files to .mp4 files
Use this tool to convert .seq files to .mp4 files.
Click on
Tools, thenChange formats, and click onChange .seq to .mp4.A window will pop up and you can then navigate and select the video folder that contains the mp4’s.
The conversion progress can be followed through the progress bar printed in the terminal window.